Wednesday, August 13, 2014

Maker Movement Documentary

If you haven't seen this, you should watch it. A documentary about Maker Movement. Be a Maker today!


Another inspiring Maker Movement video


Monday, August 4, 2014

My New Toy - Circular Saw

Buying a circular saw is not an easy task. It took me a few trips down to the hardware shop before I decided to get one. Even that day I have to make tough choices when the seller showed me a few brands with the price ranges from RM250 ~ RM800 each. To name some of the brands like Makita, Einhell, Skill, Bosch, Mintian, Quasa...etc and which some are China brands.

There are few tips you can find on the internet on how to choose the right circular saw for yourself. For home user like me and of course running on a low budget, I decided to get something less than RM300. The seller recommended Quasa which is a branded China product with a good track quality records so far. After a series of negotiations I bought it at RM275. So, here is the picture of my new circular saw, it has a 1450W output power, comes with 40 teeth, 184 x 20 mm blade size. The first thing I will use it is to build my worktable soon. 

Quasa Circular Saw

Monday, July 28, 2014

Our Father, the Maker

This Sunday morning mass, the word 'maker' struck me when I professed my faith together during the Nicene Creed - "We believe in One God, the Father almighty, Maker of heaven and earth, and all that is seen and unseen..." Before this I didn't realize the word 'maker' is being used in the church all the while and I thought the word 'maker' is only often used in the makerspace community in this decade.

Isn't how wonderful is our almighty living God who is the greatest maker, who created the universe, and a supreme creator. The world is His perfect creation that made for all of us. And He did this for us because He loves us so much.

"Abba Father, Maker of heaven and earth, I ask Thee for the gifts of making. With this gifts, help me to use them for good, and to glorify You. When I make, guide my hands and use them to heal not to destroy. Remind me everyday to admire your beautiful creation, and to praise You always. Amen"

Friday, July 25, 2014

New Pi on the Block

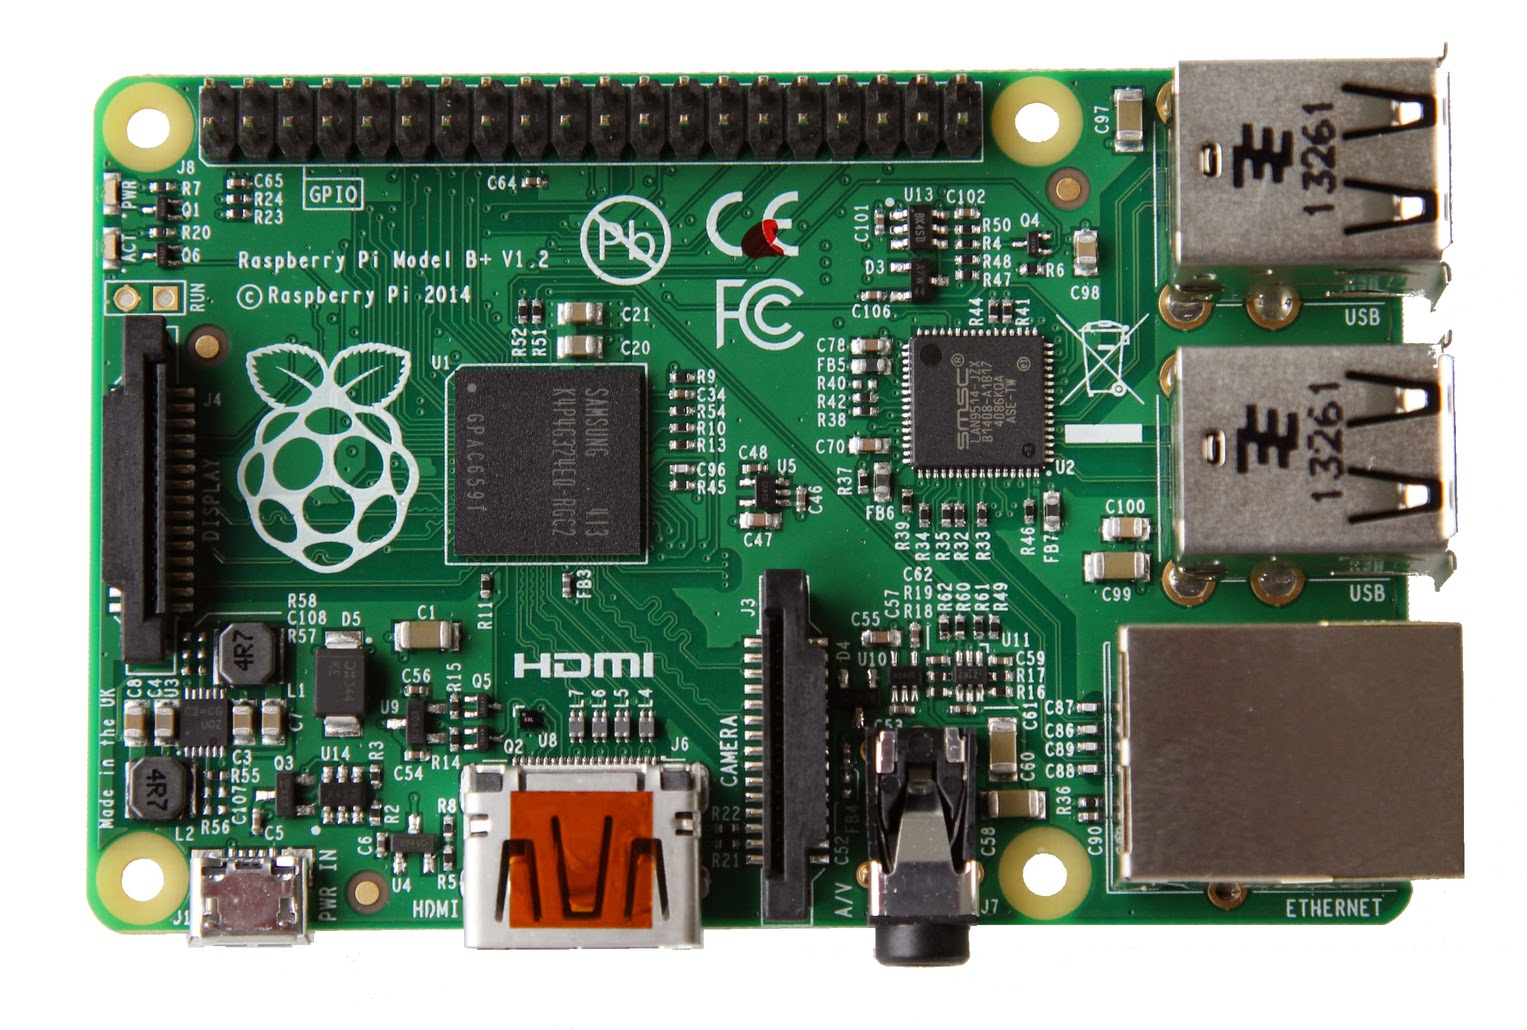
Latest Raspberry Pi model B+
Just imagine I got my Raspberry Pi model B about a year ago and recently they just launched a new B+ version. My model B board is yet on my to do project list and tirelessly making effort to master Linux on the RPi board. Following this I will have to put more effort to find a project using the RPi. Working on a project helps me to accelerate learning. The good news is the price of the new B+ version is same with B. Element14 is selling at around RM120 which is at a reasonable price.

Sticking to the same BCM2835 processor, the B+ has more GPIOs compare to the model B with additional 14 pins (yeah! more hardware). However the Beaglebone black board still top in the list for number of GPIOs. The model B+ has top up to 4 USB ports which I think is a super cool upgrade. I found out that 2 ports is never enough and you will need a USB hub to work with more peripherals. The normal size SD card is replaced with microSD card in model B+. I'm neither too keen nor excited with this change. So, what am I going to do with my existing SD card? You're safe if you are using the microSD card adapter now.

So, there are few other improvements such as lower power consumption, lower noise supply which improve audio quality and better physical board arrangement gives a good favor in this new model. Eventually, I can't wait to get this board on my working table soon. 

Saturday, July 12, 2014

A Simple PowerPoint Control Foot Switch

As a guitarist in a praise & worship session, I will have problem flipping my lyrics with chords on the paper while I'm playing. I have to pause a little while and quickly flip the pages or press enter on my laptop if the lyrics is in the PowerPoint slides. This will cause a moment of interruption on my strumming. In order to solve this problem when I'm using my laptop to refer the chords and lyrics, I built a simple foot switch control to change the slides using an al'cheapo USB keypad which you can get it from the computer shop with less than RM20.
 My PowerPoint Foot Switch Control Box

Monday, June 30, 2014

PCB UV Exposure Box

One of the coolest stuff that I made was the PCB UV exposure box. Over the years I've been using my table lamp as the light source to expose my presensitized PCBs. There have been failures and successes using the table lamp. Quite a number of incidents of over exposing and will have to redo. And is quite expensive to buy a presensitized board here. So, last year I decided to build one and never to face these problems again.

My old method using the table lamp to expose the PCB
My homemade PCB UV Exposure Box
The box is made out of MDF (medium density fibreboard) board recycled from a packing box. The piece of glass was from a picture frame I bought from a RM2 shop in Taiping. The rest of the items such as UV lamps and electronic ballasts were bought from a local electrical store, Thye Huat. Below are some more photos and please visit my Instructables website for the steps-by-step instructions and the materials I used.

UV lamps
Reused MDF boards that cut into sizes
Completed box with the cover
Here is the result

Thursday, June 26, 2014

One man's trash is another man's treasure

Guess what I found at the recycle collection area at my apartment just now. I was searching for a used oven since a year ago. Believe it or not, is still working perfectly. Guess what I'm planning to do with this oven?


To bake cake...Nope. But if you guess as a reflow oven...you're right! What is a reflow oven? Generally is an oven for reflow soldering of electronic components onto the printed circuit board (PCB). It will be useful for producing a lot of PCBs with SMT components.

Some modifications will be required before I can use as a reflow oven. I will build a controller board that will measure the temperature and control the heating element following a predefined profile temperature. Another exciting project coming up!


Proposed basic block diagram of the controller for reflow oven

Monday, June 16, 2014

My Little Humble Workspace

Some people spend most of their time in front of the TV or shopping or sleeping especially during the weekends. I spend my most of my time here, my little humble workspace. This room is not a dedicated workshop at somewhere else but is in my house. Yes, my little apartment where I'm staying with my wife and soon with my kids. We have 3 rooms and I transformed the third room into a workspace or so call personal office. My wife and I share this room for office work, building my projects, jamming and relaxing.

Half of the room is my workspace. From the pictures below, starting from the left side of the room are my bench top drill, the new 3D printer, component racks, worktable equipped with soldering station, multimeter, homemade power supply and hand tools. The right side corner of the room is the repository area. Below the table I have a old cut off saw and angle grinder which my father gave it to me. Recently I just bought a foldable workbench where I'm using it for woodworking outside my house, a wood router, palm sander and a cordless drill. You can see my homemade PCB UV box at the top of the rack in the third photo.


ATTiny13 with Arduino IDE

Some projects that I'm working do not require more than three I/O pins. Arduino UNO and even the Arduino MINI are little more than I need. I need less than 5 I/O pins, using internal clock, small, cheap and easy to program > Arduino IDE. So, I found the ATTIny13 and this website provides the step-by-step instructions how to program the ATTiny13 using Arduino's IDE with AVRISP MKII. 


I used the smeezekitty's core13 library. But I used the core13_018 version and no luck with the latest core13_18_5. Not sure why the latest version doesn't work on my PC. Anyway, this will open the door to my many other mini projects that doesn't require a lot of I/Os and cost. Mainly my reason is that I have a handful of surface mount type ATTiny13 lying around from my previous project. 

My first project with ATTiny13 will be for display board running lights. To connect to AC230V incandescent bulbs with speed control and blinking modes. Will use triacs, optoisolators and voltage regulator for this project. Will post up in my blog when is ready.

Tuesday, May 6, 2014

Our First 3D Printer

 This is our (Wei Keong and me) first 3D printer, the UP! Mini. Quite an impressive and affordable range of 3D printers. For more information about the printer, visit http://www.pp3dp.com

First trial was a disaster. The picture in the hall of shame. 

Finally, my first success print of MAKE robot.... "HOORAAY!" 

I've uploaded the time-lasped video making of the MAKE robot. Enjoy!